Isometric views are a good way to represent something in a 3D fashion, especially if the object in question is actually flat or 2D. Creating a top-down or
Why go Isometric?
In general, the main reason why you would want to transform an image into an isometric view is to make it look more realistic and give it a 3D feel to it. You can also go a step further and use this to actually build a
I use this technique when I make the instructions for my paper models, where I want the isometric view to better illustrate how to bend the folds and what goes where in general. Another good use would be to create maps, showing parts of the walls and the features thereon.
There are many reasons. In the example below, we will plant a tree.
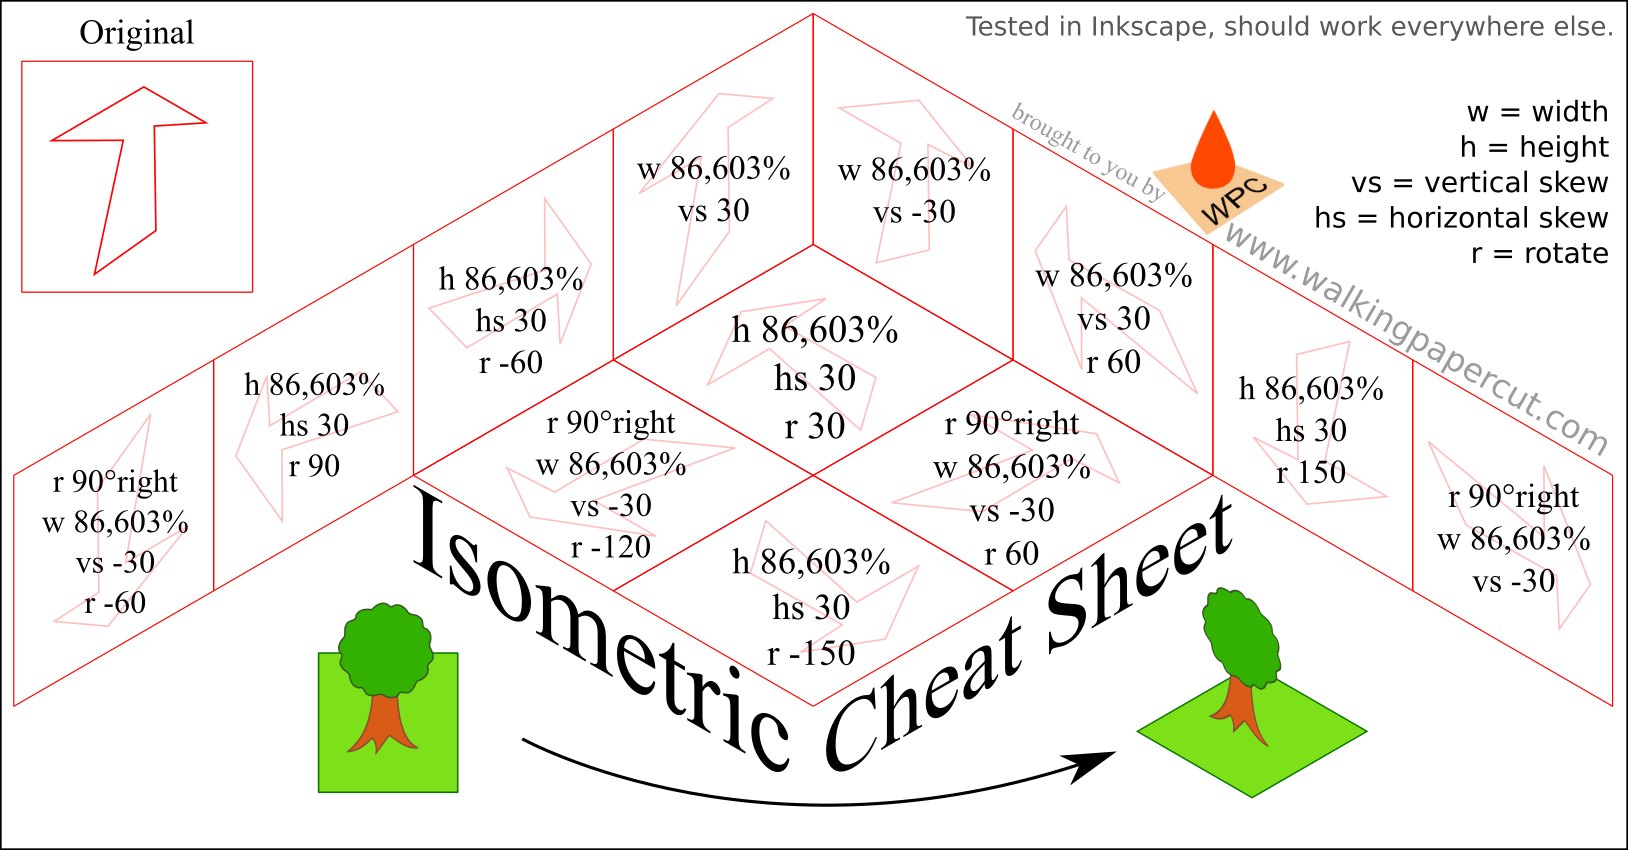
The Isometric Cheat Sheet
This cheat sheet is as simple as it gets. Check out the example below if you are having problems using it, and let me know how it works out for you when you use it! You are free to share and use it in any way, but please keep it intact and do not alter it.
Use the Isometric Cheat Sheet to Plant a Tree
Instead of building a dungeon or illustrating how to glue up a bird, we will instead plant a tree, because trees are nice. I have drawn a (very basic) tree and a piece of

Get your Orientation right
Depending on the orientation you want to end up with, there are a series of operations required to get there. The basis for this is the red arrow. Your original corresponds to the arrow pointing up. Make a copy of it, just in case, then find the arrow that you want to end up with.
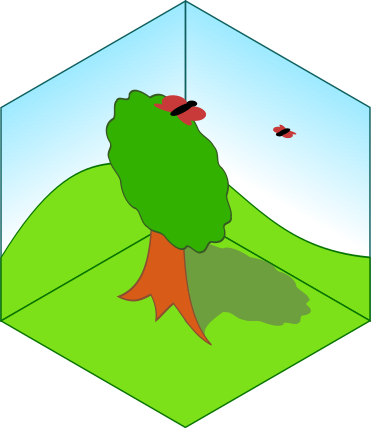
We want to plant the tree smack in the middle of this patch of meadow. That means that the tree should be standing upright (as they tend to do most of the time), and the meadow should be flat on the ground.
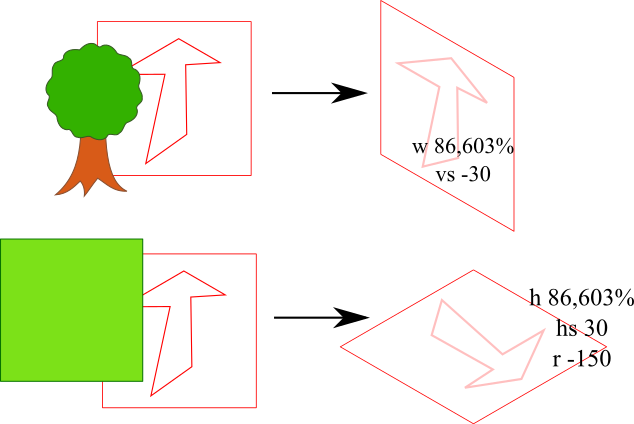
That gives us two different pieces to transform, with two different orientations, as you can see here. Keep in mind that the tree can stand in two different ways. Both will work, it is simply a matter of artistic preference. As for the meadow, since it is square there are four ways to lay it flat which will all yield the same result.
Apply the Transformation
From the cheat sheet, we get the required series of operations. They are different for both pieces because we want them to end up on different “planes”. We will go through them for the tree first:
- scale the width to 86,603% (make sure to set it to percent, not pixels or such!).
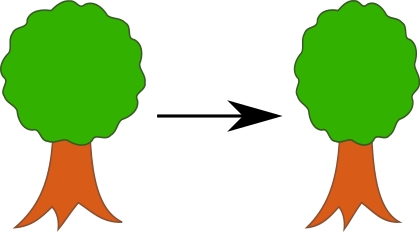
- skew vertically by 30°.
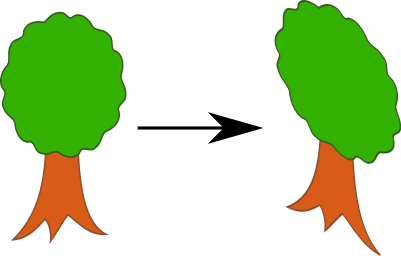
Now we can do the same for the meadow. Let us try it with one of the more complex options – although we can forego the rotation by 90° in this case since our meadow is uniform.
- scale the height to 86,603%

- skew vertically by 30°

- rotate by 60°

Final Positioning
Once you have all your items in the orientation you want them in you need to move them into the right position.
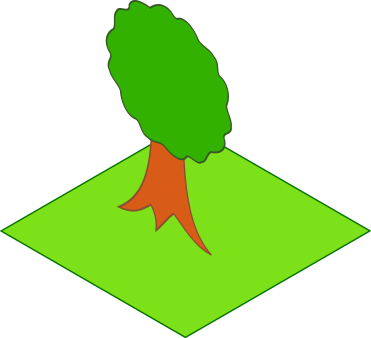
You can work by eye or use a snap-feature if your software has one. This works especially well for square parts that go together, like this little hill for our tree.
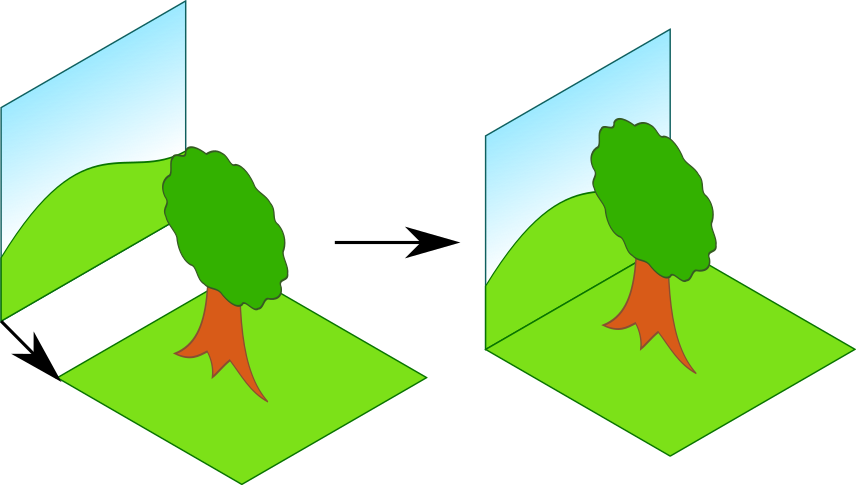
And if the hill brings a friend, you can see the isometric view coming to life, in a sense
Let me know what you think!
I always appreciate feedback, and I would love to see what you transform with this!
Be Inspired!
Dominic